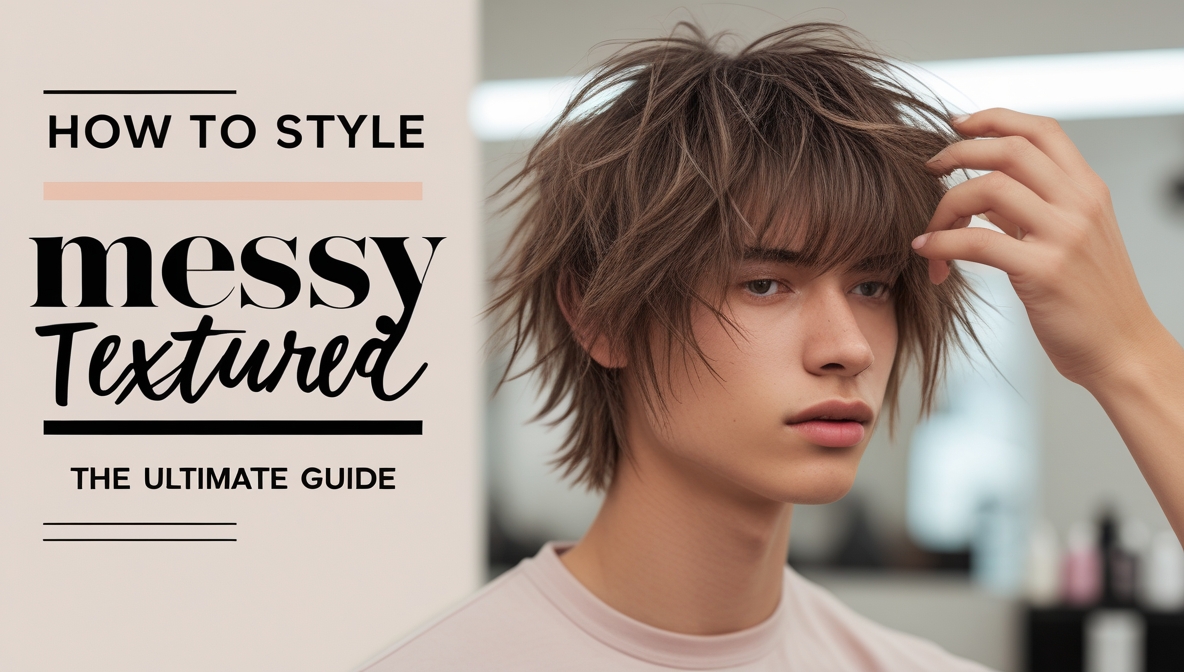
The messy textured fringe is a stylish, edgy take on classic bangs featuring choppy, airy layers and feathery ends. Suitable for nearly all face shapes and hair types, it adds effortless volume and movement. This guide covers prep, cutting tips, styling tricks, maintenance, and common mistakes to help you master the perfectly undone fringe look.
What Is the Messy Textured Fringe?
Forget helmet bangs or straight-across snoozefests. MTF is the punk-rock cousin of classic fringe—choppy ends, piecey layers, an airy finish that looks like you styled it on the way to brunch. It’s the hair equivalent of “I’m casually cool…because I threw this together in 2 minutes.”
- Chunky Layers: Cut at random-ish lengths so every piece moves.
- Feathery Ends: If you can see daylight through your fringe, you’re on the right track.
- Razor or Scissors: Whichever your stylist (or shaky hands) prefers—just ask for texturizing.
Who Can Rock It? Spoiler: Almost Everyone
Round Faces
Diagonal cuts trick the eye into length—no more chipmunk cheeks.
Square Jaws
Wispy ends soften hard angles. Think of it as makeup for your hairline.
Heart Shapes
A fringe tames a broad forehead, balances your features.
Oval Faces
Lucky you—go chunky, wispy, or side-swept. Experiment!
Hair Types
- Fine hair? Texturizing spray + point-cut layers = instant oomph.
- Thick hair? Thinning shears or a razor will remove bulk without flattening.
- Wavy/curly hair? Cut when damp so you can see the natural bounce.
Getting Ready: Your At-Home Prep Routine
1. Shampoo Smart
Pick a lightweight, volumizing shampoo. Skip anything “super moisturizing” at the roots—they’ll lay flat.
2. Conditioner—But Sparingly
Condition from mid-lengths down. Roots should be left a little thirsty for texture.
3. Rough Dry to Build Body
Towel-dry with a gentle squeeze, then loosely blow-dry upside-down for extra lift.
4. Texturizing Primer
I swear by a salt-spray mist: spray, scrunch for about 20 seconds, and walk away. Let the hair do its thing.
Cutting Guide: DIY vs. Salon Rescue
When to Dial Your Stylist
- Removing more than an inch.
- Cowlicks or uneven growth.
- That “I’ve already butchered it” scenario—better saved for a pro.
DIY Step-by-Step (Handle with Care)
- Comb Straight Down
- Clean lines = better vision of what you’ll remove.
- Point-Cut Technique
- Hold scissors vertically, snip little V-shapes into ends.
- Razor for Softness
- If you’ve got a hair razor, slide it gently at a 45° angle to feather edges.
- Check in Natural Light
- Bathroom lights lie. Always do your final check by a window.
- Mirror, Mirror
- Use two mirrors—one handheld behind to see the back.
Tiny Oops Moment
If you go too short, sweep it to the side as a quick “side fringe”—no one will know you panicked.
Styling Like a Boss
Poseidon’s guide highlights blow-dry tactics; here’s my riff:
Tools & Products Checklist
- Texturizing Cream or Paste (pea-sized)
- Blow-dryer (diffuser/nozzle optional)
- Small Round Brush
- Flexible-Hold Hairspray
Step 1: Rough-Dry
Flip your head, blast roots for 10–15 seconds, then flip back. Builds volume fast.
Step 2: Finger-Twist
Warm paste between fingertips, twist through mid-lengths/ends—roots beware.
Step 3: Round-Brush Quick Swipe
Sweep under or to the side just enough to tame rogue strands.
Step 4: Flexi-Hold Finish
Light mist—no crunchy helmets here.
Pro Tip:
For ultra-soft edges, wrap small sections around a ¾″ barrel brush, blow lightly, then tousle.
Battling the Elements
- Humidity? A bit of anti-frizz serum pre-cut, then texturizer post-styling.
- Dry Climates? A few drops of lightweight oil on ends keeps pieces from looking brittle.
- Travel Hack: Toss a small sachet of sea-salt spray in your bag—instant refresh.
Maintenance: Because Even Messy Fringes Need Love
- Trims every 4–6 weeks: Keeps layers intentional, not overgrown.
- Dry shampoo mid-week: Roots stay light, fringe stays perky.
- Silk vs. Cotton pillowcase: Silk wins—less friction, fewer break-offs.
- Water + Leave-In Mist: On no-wash days, mix a spritz of water with a drop of leave-in; scrunch.
Common Slip-Ups & How to Dodge Them
- Snipping Too Much Too Fast
- Less is more—cut in stages.
- Product Overload
- A pea-size was enough, remember? Overdo it, and you’ll regret it.
- Fighting Your Natural Fall
- Cowlicks exist for a reason—embrace the direction your hair wants.
Variations to Keep It Fresh
- Curtain-Messy Hybrid: Longer sides, shorter middle—soft ‘70s nostalgia.
- Micro Textured Fringe: Bold, edgy, and ultra-short—only if you dare.
- Dip-Dye Ends: Pastel tips or a neon streak—fun weekend experiment.
The Time My Fringe Nearly Took Over My Life
Picture this: a weekend getaway in Bali, me styling my fringe with a hotel hairdryer (think tiny wattage). Ended up with a weird poof that looked more helmet than fringe—cue a frantic hunt for dry shampoo at 10 p.m. Lesson learned: pack your own styling kit, always.
Conclusion
The messy textured fringe is that “cool friend” who always looks like they woke up fabulous. It’s approachable, adaptable, and—yes—low-maintenance (if you follow the steps above). So, grab those scissors (or your stylist), dive in, and remember: a little imperfection is the whole point. Happy snipping—and may your fringe always be feathery, never flat!
FAQs
Will a messy fringe suit curly hair?
Absolutely! Embrace the curls—just cut when damp to see the natural length.
Can I grow out a messy fringe gracefully?
A: Yes—ask your stylist for long layers that blend into the rest of your hair, then tuck behind your ears as it grows.
How do I deal with cowlicks?
A: Work with them! Use a bit of pomade at the root and direct hair in the natural growth pattern.