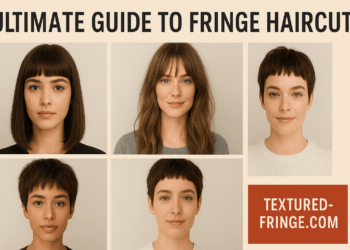
I’ll be honest—I used to think textured fringe was just for folks with wild, wavy hair. But then I tried it on my straight-ish mop one boring Tuesday afternoon and, well, here we are. If you’ve ever stared into the mirror and wondered, “Can I actually pull this off?”—this one’s for you.
Whether you’ve got naturally tousled strands or bone-straight locks, a textured fringe can add that effortless, slightly edgy vibe to your style. But figuring out how to style it? That’s where things get interesting. Let’s walk through it like friends chatting in a salon chair.
What Exactly Is a Textured Fringe?
A textured fringe isn’t the blunt, heavy curtain of yesteryears. It’s layered, airy, and slightly uneven (on purpose). Think more rock-n-roll cool than school-picture-day neat.
A textured fringe can work with pretty much any hair type, which is the beauty of it. It’s all about creating movement and softness around the face.
Step-by-Step: How to Style Textured Fringe
1. Start with Clean, Damp Hair
Okay, so first things first: wash your hair or at least dampen your fringe. It’s way easier to mold when slightly wet. Trust me, trying to tame dry, stubborn fringe is like trying to fold a fitted sheet—you’ll cry.
2. Use a Volumizing Mousse or Texturizing Spray
Pump up that fringe with a dollop of lightweight mousse or a spritz of sea salt spray. This gives it some grit—like your fringe just came back from a beach holiday.
3. Blow-Dry With a Round Brush (or Just Your Fingers)
You don’t need fancy tools. If you’re feeling extra, use a small round brush to add a gentle curl under. Otherwise, just direct the hair side-to-side using your fingers and a dryer. This trick adds bounce and prevents flat, forehead-hugging fringe.
Personal tip: Flip your fringe side to side while drying. It gives that breezy, natural part that almost looks like you didn’t try (but you totally did).
Also Read About Low Taper Textured Fringe
4. Add Texture
Once dry, use a tiny bit of styling wax, pomade, or matte paste—less is more here. Rub it between your fingers and lightly pinch sections of the fringe to create separation and lift.
5. Finish with a Light-Hold Spray
No need to shellac your fringe into place. A flexible hold spray will keep it bouncy and touchable, not stiff and crunchy.
Tips for Different Hair Types
➤ For Straight Hair:
You might need a bit more product to get that lived-in texture. Don’t be afraid to rough it up a little with your hands post-blow-dry.
➤ For Wavy Hair:
You’re already halfway there. Just encourage the natural bend and finish with texture spray for extra definition.
➤ For Curly Hair:
Work with the curl pattern! Use a diffuser to enhance texture and trim the fringe in dry form to avoid shrinkage surprises.
Also Read About Burst Fade Haricut
Common Mistakes to Avoid
- Using too much product. You’ll weigh it down and lose that soft, fluffy vibe.
- Forgetting to trim. A textured fringe needs maintenance, or it starts looking a little… meh.
- Over-styling. Let it be imperfect. That’s kind of the whole point.
Final Thoughts
Honestly, styling a textured fringe is all about feeling it out. No two heads are the same. Some days it’ll sit just right, and others, it’ll have a personality of its own (mine likes to rebel before coffee).
If you’re experimenting, go with the flow—mess it up a bit, try different parts, maybe even pair it with a ponytail or bun. The fringe isn’t supposed to be perfect, and neither are we.
FAQs
Can you style textured fringe with straight hair?
Yes, totally! You just need the right products like sea salt spray or mousse and a little styling effort to add movement.
What’s the best product for styling textured fringe?
A good sea salt spray, lightweight mousse, or matte wax works wonders. Avoid anything too heavy.
Should I style my fringe wet or dry?
Start when it’s damp. Blow-drying helps shape it better and adds volume.
How often should I trim a textured fringe?
Every 3–4 weeks keeps it fresh and shapely.
Is textured fringe high maintenance?
Not really. Once you get the hang of styling it, it’s actually pretty chill.


